The following is based on changes to the configs that have not yet been made live. But I just went through the effort myself so I wanted to make a tutorial while it was fresh in my mind.
Problem
I run my main home automation on an instance of openHAB that is running on a separate machine from the HestiaPi. I want my thermostat to be mainly stand alone and let my main openHAB send commands or setting changes to it.
In the rest of this tutorial I’ll call my main openHAB OH and the thermostat HestiaPi.
Approach
The integration will be done through MQTT. The only Rules required will be on the OH instance. But there are some new Things and changes to existing Things that need to be made on the HestiaPi. This tutorial shows making the latter changes through PaperUI. For those running the current release of the HestiaPi the changes to existing Things need to be made in the default.things file.
This tutorial will show how I integrated Heating. Repeat the same steps for your other devices as needed.
Implementation
Broker connection
We will have OH subscribe to the HestiaPi’s MQTT broker. Alternative approaches include bridging the HestiaPi’s Broker with our main home automation broker, setting up an event bus configuration, or changing the HestiaPi to use your main home automation broker.
On OH create a new MQTT Broker Thing and configure it with connection information for the HestiaPi’s MQTT broker.
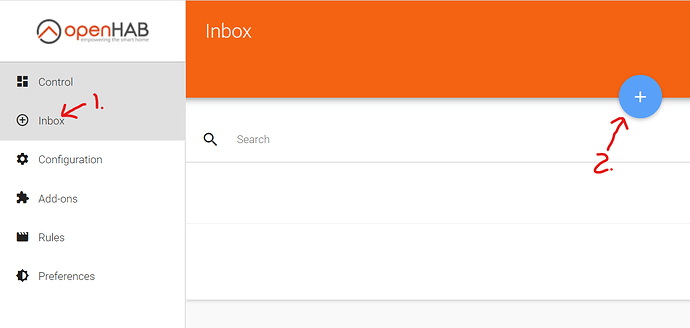
- In PaperUI on OH click on Inbox and then click then
- click the + icon
- Select MQTT Binding
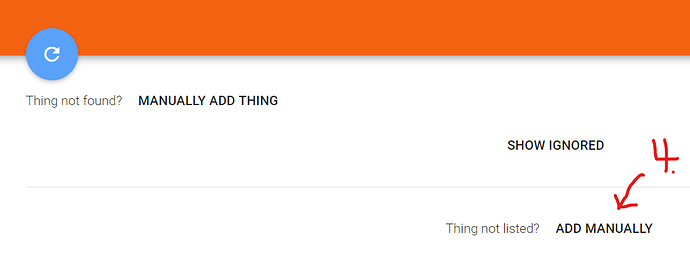
- Select “ADD MANUALLY”
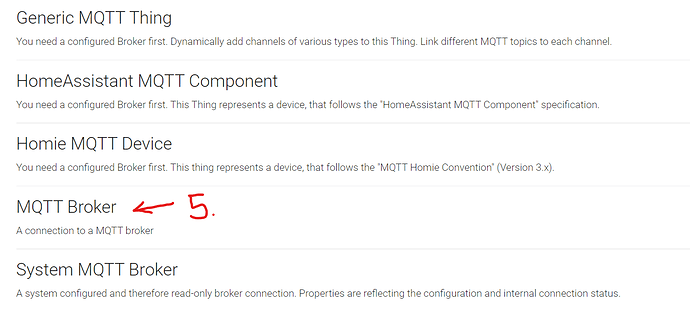
- Select “MQTT Broker”
-
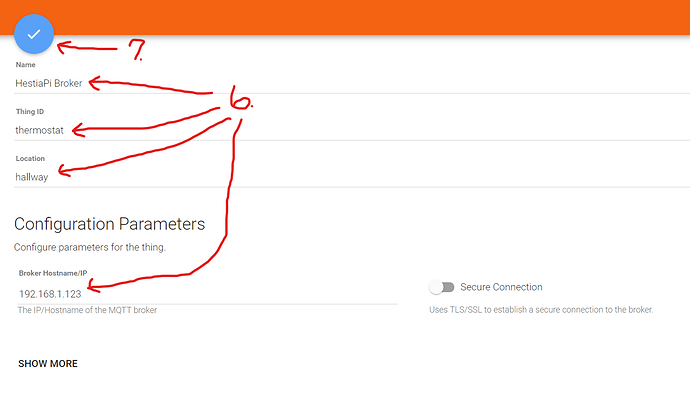
Fill in all the relevant information. The only thing that is required is the address of the HestiaPi. The rest can be left at the default.
-
Click the blue check.
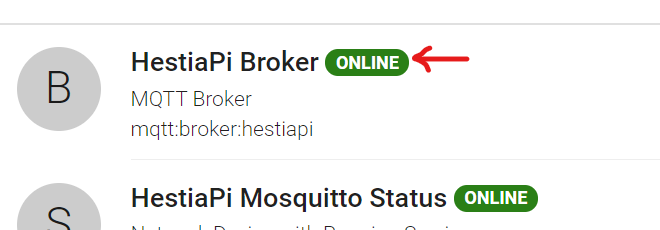
Browse to the newly create Thing and verify it shows as Online.
Now we will create a Generic MQTT Thing to represent the thermostat in OH. Repeat steps 1-4 above and this time select “Generic MQTT Thing” instead. I named this Thing “HestiaPi Thermostat”. This one Thing will be used for all the interaction with the HestiaPi.
This only needs to be done once no matter how many devices you plan on integrating.
Heating Mode
This section needs to be repeated for all the devices you want to integrate with OH.
As discovered by @atd, the existing HeatingMode Item on the HestiaPi is driven by two MQTT Topics:
-
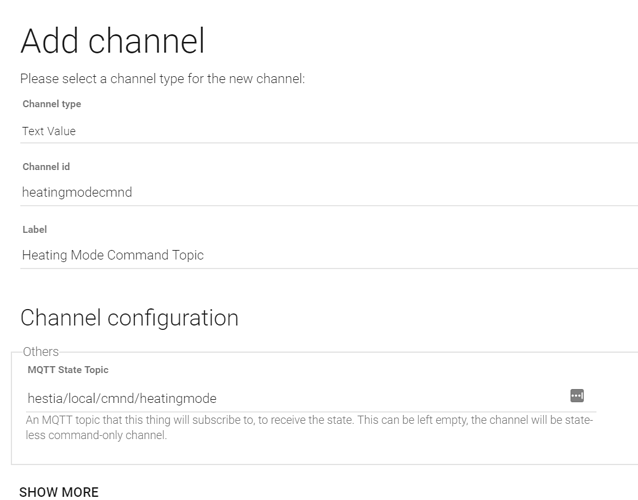
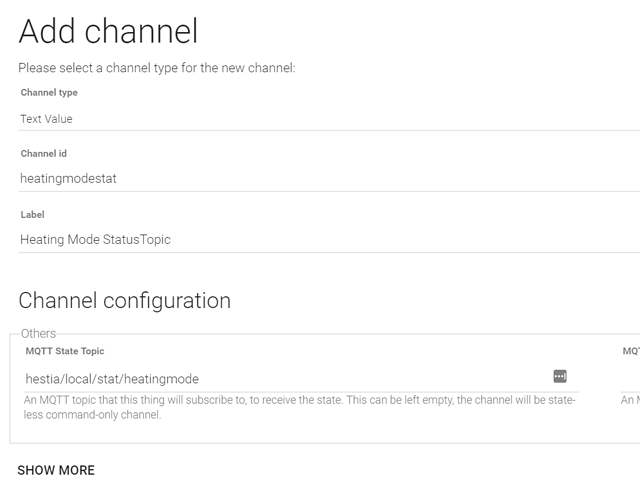
hestia/local/stat/heatingmode: published to when the mode is changed by physically pressing the buttons on the LCD UI. -
hestia/local/cmnd/heatingmode: published to when the mode is changed internal to the HestiaPi openHAB
Unfortunately, in order to change the mode and have the LCD properly updated from OH, one needs to publish to both topics. The best way I’ve found to make sure this happens flawlessly is through Rules and proxy Items.
Channels
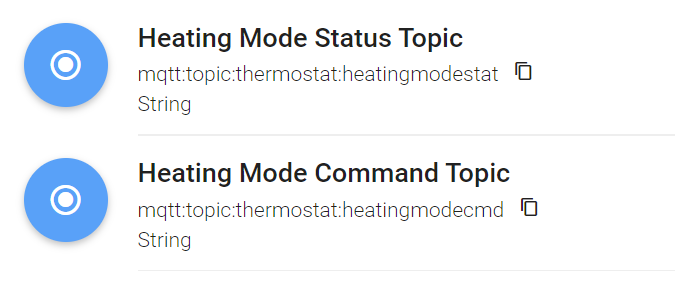
We will create two text Channels on the HestiaPi Thing, one that subscribes to the stat topic and another that subscribes to the cmnd topic.
Items
Next we will create three Items.
String vHeating_Mode "Heating Mode [%s]" <fire>

String vHeating_Mode_Stat { channel="mqtt:topic:thermostat:heatingmodestat" }

String vHeating_Mode_Cmnd { channel="mqtt:topic:thermostat:heatingmodecmd" }
Copy the channel ID from the Thing screen (click the little two box icon). Alternatively you can create and link the Items using PaperUI directly.
vHeating_Mode is a proxy Item that will be placed on OH’s sitemap. The other two Items are linked to the Channels subscribed to the two HestiaPi topics. We will use Rules to keep these Items in sync.
Rules
We need two Rules, one to publish new commands to vHeating_Mode to both of the topics the HestiaPi defines. The second Rule takes and new messages on those topics and updates vHeating_Mode as necessary.
Rules DSL version
This version has not been tested.
rule "Send commands to HestiaPi"
when
    Item HeatingMode received command
then
    val mqttActions = getActions("mqtt","<broker Thing ID>") // replace <broker Thing ID with the Thing UID for your Broker Thing

    // Only publish the command if the new state is different from the message currently on the MQTT topic.
    // This will prevent loops.
    if(HeatingMode.state != HeatingModeState.state) {
        mqttttActions.publishMQTT("hestia/local/cmnd/heatingmode", receivedCommand.toString, true) // the last true makes the message retained
    }
    if(HeatingMode.state != HeatingModeCmd.state)  {
        mqttActions.publishMQTT("hestia/local/stat/heatingmode", receivedCommand.toString, true)
    }
end

rule "Updates from HestiaPi"
when
    Item HeatingModeState changed or
    Item HeatingModeCmd changed
then
    // Only update the proxy if the change is different from the current proxy state. This helps
    // avoid loops.
    if(triggeringItem.state != HeatingMode.state)  HeatingMode.postUpdate(triggeringItem.state)
end
Python Version
These are the rules I’m running.
from core.rules import rule
from core.triggers import when

broker = "mqtt:broker:hestiapi"

@rule("Publish Heating Mode Changes",
      description="Publishes new modes to both hestiapi topics")
@when("Item vHeating_Mode received command")
def heatingMode(event):
    action = actions.get("mqtt", broker)
    if action:
        action.publishMQTT("hestia/local/stat/heatingmode", event.itemCommand.toString(), True)
        action.publishMQTT("hestia/local/cmnd/heatingmode", event.itemCommand.toString(), True)
    else:
        heatingMode.log.error("There is no broker thing {}!".format(broker))

@rule("Update Remote Heating Mode Changes",
      description="Synchronize changes made on the HestiaPi itself with the local proxy.")
@when("Item vHeating_Mode_Stat changed")
@when("Item vHeating_Mode_Cmnd changed")
def remoteHeatingMode(event):
    if event.itemState != items["vHeating_Mode"]:
        events.postUpdate("vHeating_Mode", event.itemState.toString())
Theory of operation: When vHeating_Mode is commanded, publish the new command to the two HestiaPi topics using the MQTT Action. When a new message is published to any of the two MQTT topics that changes the state of the linked Items, update vHeating_Mode to match the new state if it’s different.
Sitemap
Add the following entry to your sitemap.
Switch item=vHeating_Mode label="Heating Mode []" mappings=[ON=Auto,OFF=Off,Boost=Boost]
Test is out and make sure it works. Pay attention that both the HestiaPi BasicUI updates as well as the LCD UI.
Repeat for the modes of the other devices you want to integrate.
Temperature and Setpoint
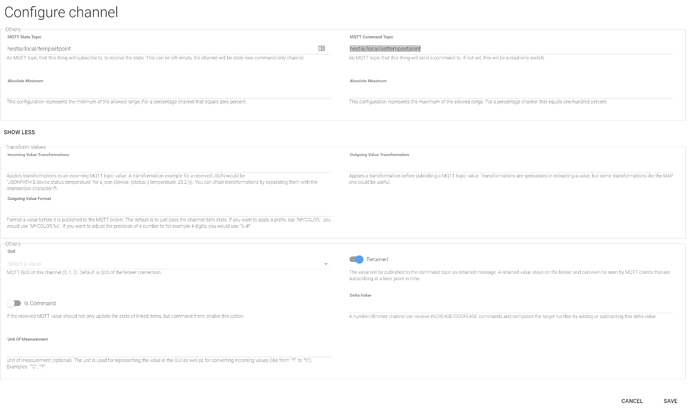
Using the same steps as above, create a number Channel on the HestiaPi Thermostat Thing that subscribes to and commands hestia/local/settempsetpoint. Make sure to check “Retained”.
Create another number Channel on the HestiaPi Thermostat Thing that subscribes to hestia/local/temperature.
Create two Number Items to link to the two new Channels.
Number vMainfloor_Temp "Main Floor Ambient Temp [%d °F]" <temperature> { channel="mqtt:topic:thermostat:temperature" }

Number aMainfloor_TargetTemp "Furnace Target Temp [%.0f °F]" <temperature> { channel="mqtt:topic:thermostat:tgttemp", autoupdate="false" }
Pay attention to the autoupdate setting on the target temp. This will keep the Item from updating until the new temp setting is republished to the MQTT topic by the HestiaPi.
Put the following on your sitemap.
Setpoint item=aMainfloor_TargetTemp minValue=50 maxValue=75 step=1
Text item=vMainfloor_Temp
If you are using C, adjust the min and max and step as appropriate.
Boost
The way that boost mode works is different in the new and not yet released configurations and the 1.1 version. The following shows how to integrate Boost using the new configuration.
Boost involves three Items on the HestiaPi:
-
HeatingMode: this has already been covered -
HeatingBoostTime: holds the amount of time the boost will run, it can be adjusted when boost mode is not running -
HeatingRemBoostTime: holds how much time remains on the currently running boost mode, it can be adjusted when boost mode is running
HeatingRemBoostTime is the only one that is linked to an MQTT topic by default, and this only publishes the remaining time and doesn’t subscribe meaning we can’t change the time from OH. HeatingBoostTime isn’t linked to any MQTT topics at all so those need to be created.
Things
HestiaPi
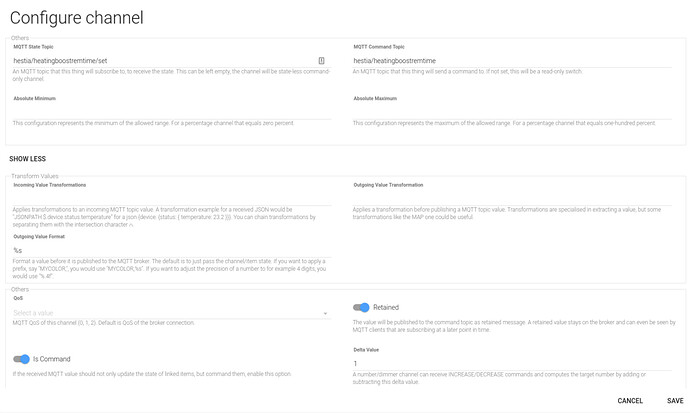
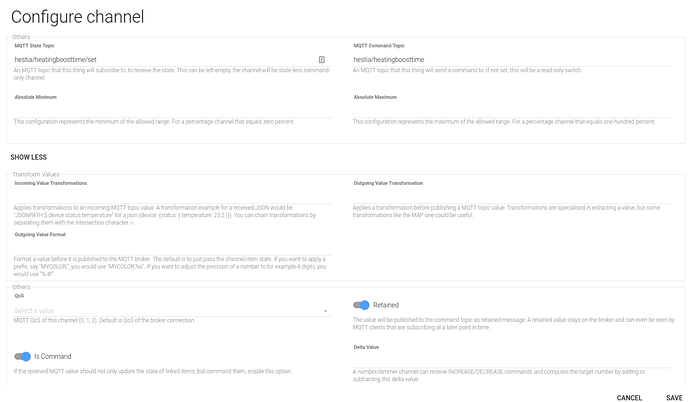
There is already an MQTT Thing on the HestiaPi for the HeatingRemBoostTime. We just need to add an MQTT State Topic so it will subscribe for updates from OH. Add hestia/heatingboostremtime/set to the MQTT State Topic.
Make sure Is Command is checked.
If using the currently released config, open default.things, search for “heatingboostremtime”, and add a field for the state topic.
Now create a brand new Channel on the HestiaPi to subscribe and publish to the heatingboosttime topics. We will subscribe to hestia/heatingboosttime/set and command topic hestia/heatingboosttime. Make sure retained and is command are checked.
Link the newly created Channel to the HeatingBoostTime Item.
OH
On the OH side create two new Channels, one for Boost and one for RemBoost.
For the Boost Channel, subscribe to hestia/heatingboostremtime and command hestia/heatingboostremtime/set. Set the retained flag.
For the RemBoost Channel subscribe to hestia/heatingboostremtime and command hestia/heatingboostremtime/set. You don’t need to set the retained flag.
Create two new Items.
Number aHeating_Boost_Time "Heating Boost Time" <time> { channel="mqtt:topic:thermostat:heatingboostime" }

Number aHeating_Rem_Boost_Time "Remaining Heating Boost Time" <time> { channel="mqtt:topic:thermostat:heatingremboost" }
We will use the visibility tag on the sitemap to only show one of these two at a time based on whether or not we are in boost mode or not.
Setpoint item=aHeating_Boost_Time minValue=10 maxValue=1440 step=10 visibility=[aHeating_Rem_Boost_Time<=0, aHeating_Rem_Boost_Time==NULL]
Setpoint item=aHeating_Rem_Boost_Time minValue=0 maxValue=1440 step=1 visibility=[aHeating_Rem_Boost_Time>0]
Test to verify that it works.
Conclusion
I know this tutorial seems long and complicated but I think once you get into it you will find that it’s pretty easy and straight forward. Questions are welcome!
